Friday, 20 November 2015
Task 10: After Effects
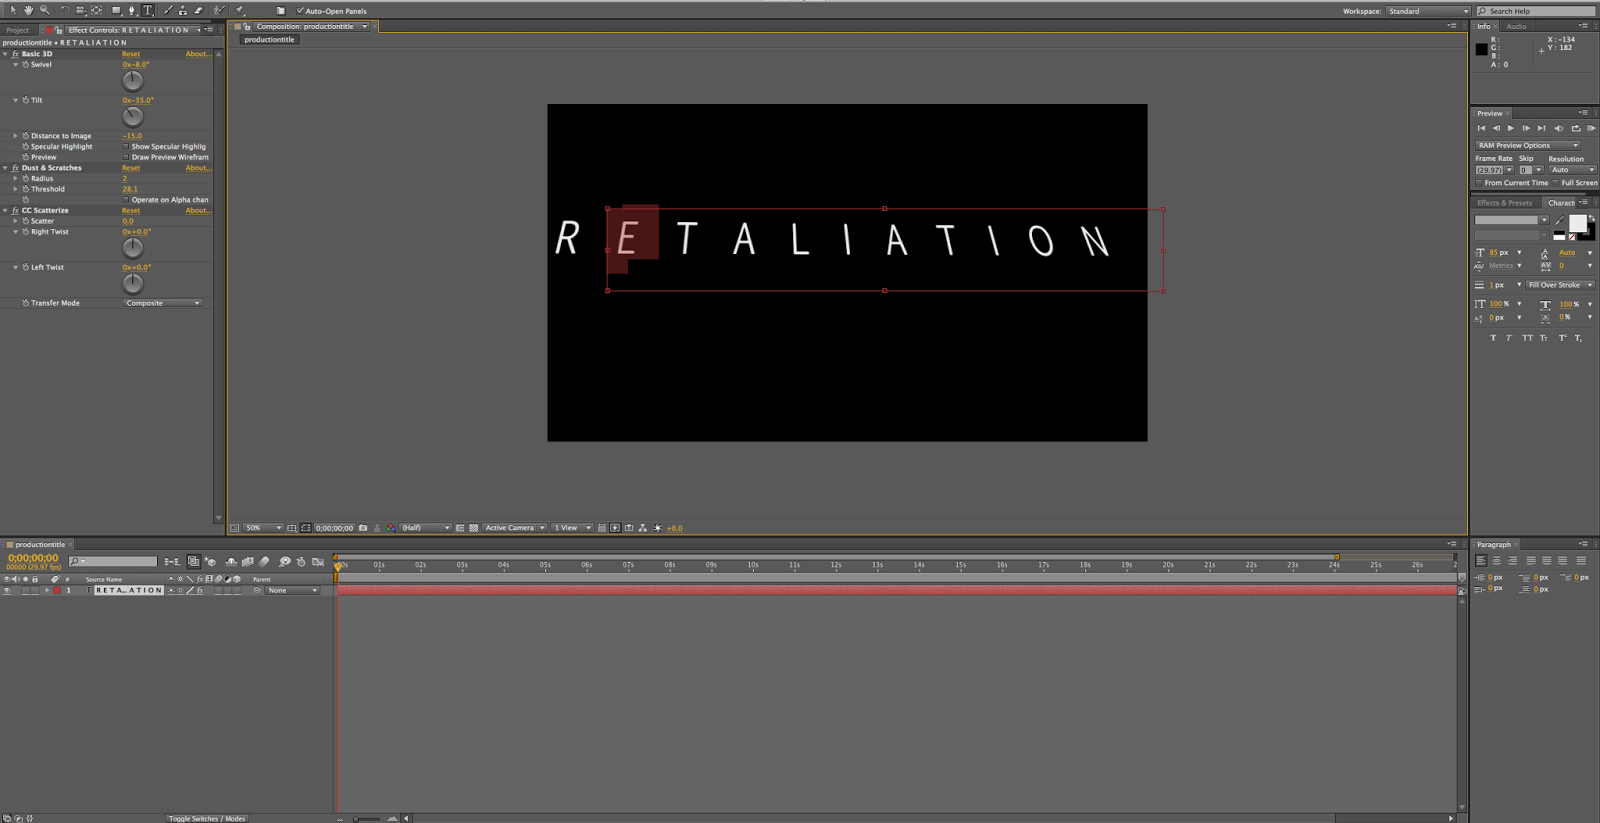
As films conventionally include the studios logos before the film, we decided to create our own. To do this we used After Effects, which is industry-standard in creating logos and compositions. Despite practicing with After Effects in AS, we found it difficult to understand and it took a while to get some ideas created. We decided to add an animated background with text that transitioned in, as we felt this was the most aesthetically pleasing. After exporting we decided to import it into Premiere, where we added a sound effect. When this was finalised we added it to the beginning of our short film.

Thursday, 19 November 2015
Task 10: Editing - Sound
As our production contained diegetic sound, we made sure that we used high quality equipment to record it. The JVC camera we used had an excellent microphone built in that was suitable.
However, even after this there was still unwanted audio in the shots, particularly the outside ones, such as the wind. There was no way I could have prevented this during the filming, however in Adobe Premiere I could add sound effects to remove the unwanted noise.
 I added a highpass filter to the outside shots so that the only sounds of a specific decibel reading can pass through. This meant that the sounds of the door opening was picked up but the wind in the background was not. As well as being more satisfying to listen too, it also helped each shot to flow, as the sound was consistent throughout, meaning that hopefully the continuous editing is unnoticeable.
We decided to overlap the audio slightly with the jump cut to emphasize the sudden change and to create tension. This was very subtle but we thought it looked a lot better than it did previously and helped the shots flow despite the jump.
After this I added soundtracks. Initially after adding the first soundtrack I felt that the ending was too abrupt. I tried to fade it out but it wasn't successful, so I decided to add an more ambient soundtrack to the end of it so that they overlapped seamlessly, and this also helped to build tension in the subsequent scene that showed the protagonist trying to find out what was outside.
Once we filmed the later parts of the film, I noticed for many of the scenes the sound was left ear only. This made it unpleasant to listen to so I decided to try and fix this in Premiere. I found out that there was an audio effect called 'fill left' which meant that the audio from the left ear was replicated on the right side. We applied this to all of the scenes.
However, even after this there was still unwanted audio in the shots, particularly the outside ones, such as the wind. There was no way I could have prevented this during the filming, however in Adobe Premiere I could add sound effects to remove the unwanted noise.
We decided to overlap the audio slightly with the jump cut to emphasize the sudden change and to create tension. This was very subtle but we thought it looked a lot better than it did previously and helped the shots flow despite the jump.
After this I added soundtracks. Initially after adding the first soundtrack I felt that the ending was too abrupt. I tried to fade it out but it wasn't successful, so I decided to add an more ambient soundtrack to the end of it so that they overlapped seamlessly, and this also helped to build tension in the subsequent scene that showed the protagonist trying to find out what was outside.
Once we filmed the later parts of the film, I noticed for many of the scenes the sound was left ear only. This made it unpleasant to listen to so I decided to try and fix this in Premiere. I found out that there was an audio effect called 'fill left' which meant that the audio from the left ear was replicated on the right side. We applied this to all of the scenes.
Wednesday, 18 November 2015
Task 10: Editing - Colour Correction
As our film is a thriller, we felt that it's darker themes meant that the colours would have to suit it. We decided to reduce the intensity of the colour, as we wanted to emphasize the protagonist's emotions of both isolation and fear. We did this by adding... We also decided to increase the contrast, as we wanted the shadows to be more harsh to unnerve the viewer.
Our film was filmed with a 16:9 aspect ratio, however after further research into the thriller genre, we found out that the conventional aspect ratio was an anamorphic 2.39:1. Therefore we decided to change it in post production.There is not a concrete method of changing aspect ratios in Premiere, but it can be done a variety of different ways. One method we looked at is cropping the video 12.5% on the top and bottom. Although this is easy to do and works effectively, it prevented us from framing the shot afterwards, and the head of the subject was often cut off. We decided to try a different method, which was to add two separate black colour matte's on the above video layers, This meant that the below layers weren't affected and, as a result, we could re-position the shot so that it contained the subject. Also, as this was in a separate layer, it could be dragged across the duration of the film, so it did not have to be repeated for each shot, which would have been the case for cropping.

Our film was filmed with a 16:9 aspect ratio, however after further research into the thriller genre, we found out that the conventional aspect ratio was an anamorphic 2.39:1. Therefore we decided to change it in post production.There is not a concrete method of changing aspect ratios in Premiere, but it can be done a variety of different ways. One method we looked at is cropping the video 12.5% on the top and bottom. Although this is easy to do and works effectively, it prevented us from framing the shot afterwards, and the head of the subject was often cut off. We decided to try a different method, which was to add two separate black colour matte's on the above video layers, This meant that the below layers weren't affected and, as a result, we could re-position the shot so that it contained the subject. Also, as this was in a separate layer, it could be dragged across the duration of the film, so it did not have to be repeated for each shot, which would have been the case for cropping.
Tuesday, 17 November 2015
Task 10: Editing - Cutting
We began by importing all of the clips into premiere pro and placed the clips we intended to use onto the timeline in chronological order. There was a lot of clips that were considered unusable, but some shots had multiple successes and therefore we had to choose the best one. We picked favourites and decided to keep the backups for later on in the editing stage when sound is added so that we can see which shot fits better. We then watched the clips through and used the razor tool to cut them appropriately. We had a couple of match on action shots that we needed to cut specifically to show that both shots are continuous and flow. There was one jump cut in our film and we wanted to emphasize this by slightly overlapping the sound, which is loud and keeps the viewer on edge.


Thursday, 5 November 2015
November feedback
Your web-log needs some attention as the last posts was 8th October. Dkeep up the regular posts and esnure all reserach and planning is now published.
Your short film has a clear progression of shots and the bars are effective in giving it a cinematic look. Shots are of a good quality and framing and composition are proficient showing excellent technical skill in use of the camera. Audio has been considered and a JVC camera has been used which shows ambition and an ability to use a more advanced camera.
Music is appropriate and builds tension ass does the length of shots. Feedback may indicate that shots are lengthy but this suits the style of the short film.
Music is copyright free as it is sourced from Incomputech so make this clear in your web-log or put it in the credits.
Document your creative journey
I don't think you need to overdub sound but maybe add some ambient sounds or effects.
The narrative is clear. Make sure that the story is not cliched. Be original and think of a twist at the end or defy expectations. I am intrigued as to how you will resolve the narrative. this is the key to level 4.
Subscribe to:
Comments (Atom)